

Back in April, I got to work on the model. I made some sketch plans and decided on an active pose; she would be frolicking, up on her hind legs in a mixed canter/leap pose.
She started out the same way as all other sculptures - this a wire armature. I experimented with different thicknesses of wires until I was happy with them I compared the size of the armature with Union Jack so that the two foals would be comparable in size and scale.

Once happy with the armature, I started sculpting. I wanted to be a little more methodical in the creation of this model so I measured carefully and marked out the various landmarks and blocked in the rib cage and pelvis.
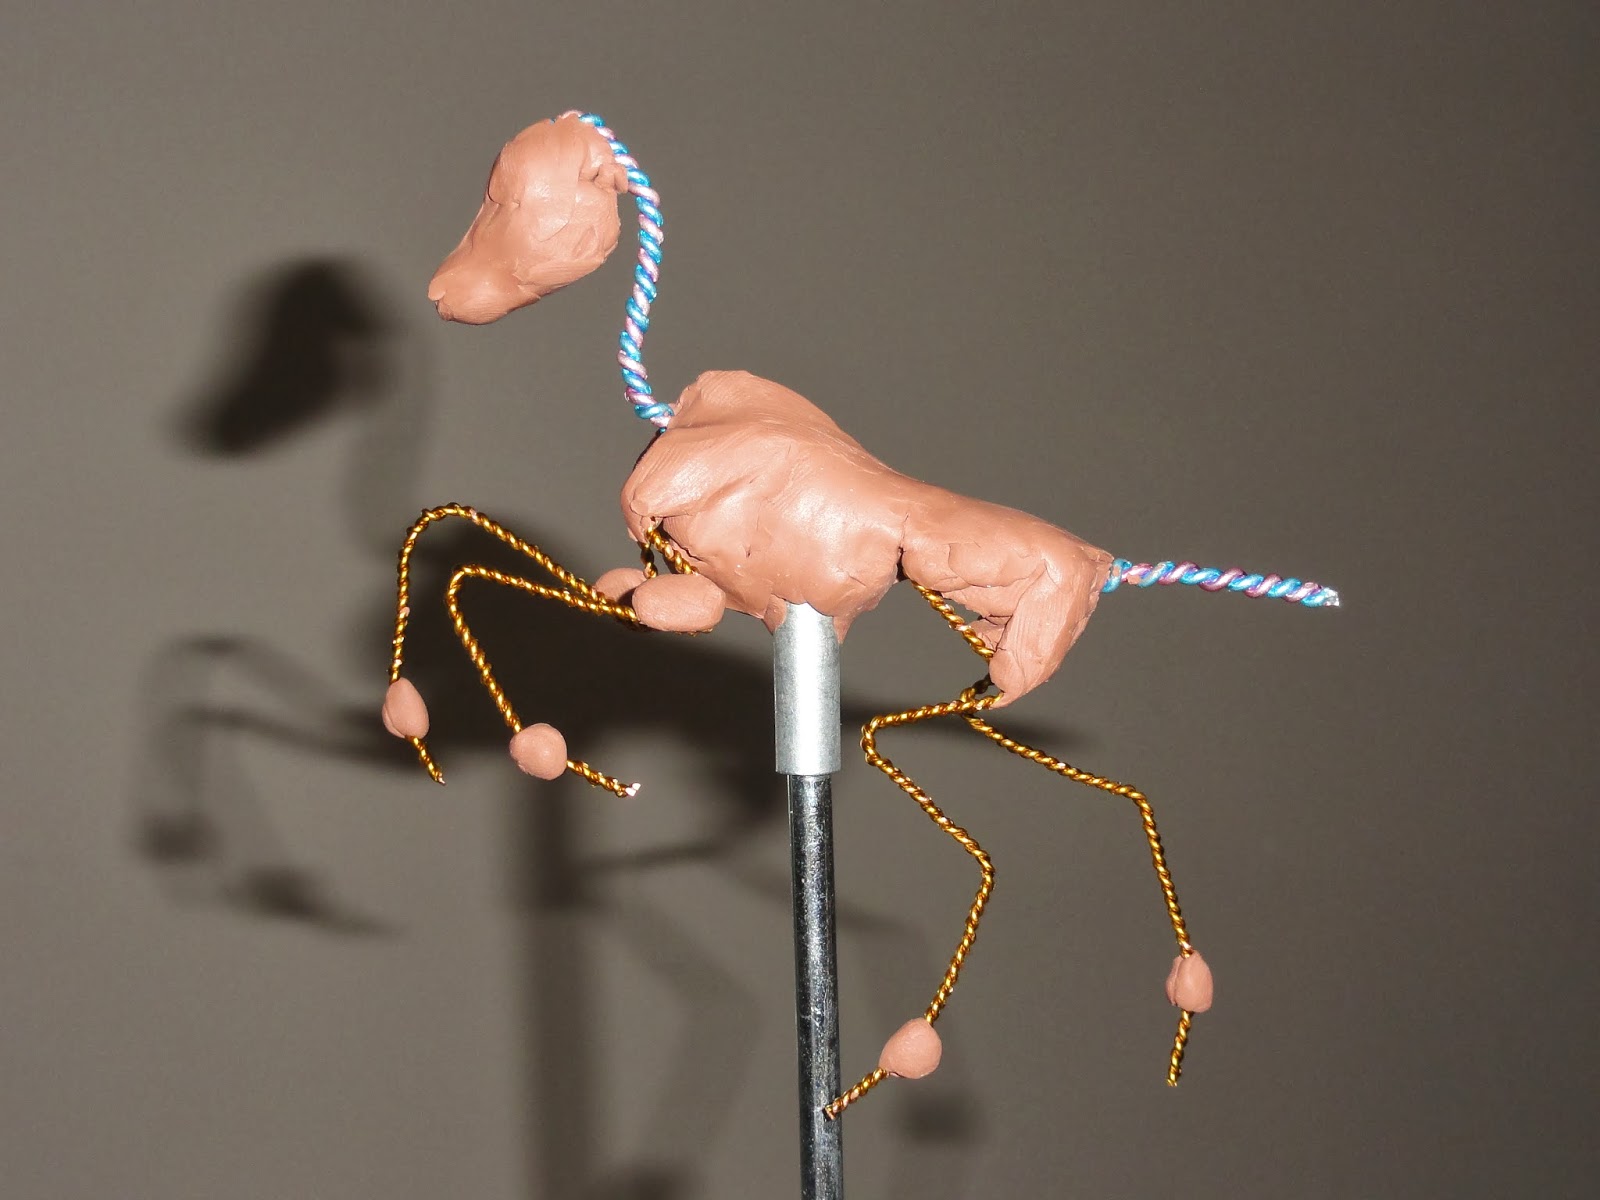
In the next session I started building up the outline of the neck and major bones and muscles.

Adding more clay, she began to take shape. These last few sessions took place in Dunmanway, Co. Cork in Ireland as we were visiting family there.

This fuzzy photo was taken on the plane on the way home - I'm always ready to sculpt during any spare moments I get. The flight was only an hour but I made some progress on her.

Back home, I kept building her up and started to add in some details.


I was aiming for classic scale - I'd say these two look pretty well matched :)

A not-so-glamorous shot of how the clay model spent the time when I wasn't working on it. This clay is very sticky and dust loves to mix in with it, so I found a sandwich bag was just the right size to keep the dreaded dust away!

These photos show the final tweaks, which took many many hours to get just right. Each photo represents a sculpting session and those sessions averaged around 4-5 hours each, I've skipped a few sessions throughout this blog as sometime the work I've done in a multi-hour session is so subtle it hardly shows.


Finally, I felt happy with the model. This is by no means complete so some details are not even added here but this was the point where I felt that any further progress should take place on a resin copy.

So, it was time for the waste mould! First, the preparations - I had to think up-side-down and try to work out the best places to put the sprues. Sprues allow the air bubbles to escape from undercuts so that the resin can fill all the nooks and crannies. I used thicker sprues on the back hooves as they would serve a dual purpose later on.

Happy with my sprues and confident that they were securely placed, I got to mixing the first layer of rubber. This first layer is painted on thickly in order to make sure no bubbles sit on the surface of the mould.

First layer applied, it was time to build the mould box!

I used to use wood for this, or Lego (tm) but I've found that acrylic (or polycarbonate in this case) is the best material to use.

I made the box as small as I could whilst keeping about half an inch all round the model.

I kept the mould box small so that the waste mould wouldn't use up too much rubber. Another trick I learnt from fellow sculpting and casting artist, Becky Turner, was to cut up old moulds and mix them in with the new rubber to fill it out. Rubber is very expensive and cannot be re-worked, but cut up like this it can be re-purposed and helps to reduce costs. I wouldn't do this on a production mould as the varying densities of the rubber can subtly show on the cast, but as I planned to work on the casting this wasn't an issue here.

Scary moment - pouring the newly mixed rubber. The idea is to pour the rubber to the bottom of the box and allow it to fill slowly, this does seem a pretty reliable method.

Almost-disaster! I had glued my Polycarbonate pieces together, but I would ALWAYS back that up with tape or rubber bands. You may have noticed in the photo above that there is neither... well, thankfully I was there when the side split and managed to wrestle it back together and get it securely taped up before the rubber spilled out. This rubber is very thick and viscous which helped, the rubber I use dot use was very thin and would have gushed out everywhere. Lesson learnt!

A few hours later, the rubber has cured and it's time to remove the clay model. Easier said than done, however I had been a little bit canny with that first blue cost of rubber...

Knowing where to cut is always difficult but thanks to the blue rubber acting as a guide, I managed to cut a nice clean slice to get to the clay model.

You always wan the cuts to be a as small as possible, so some wrestling is required to remove the original. the clay models rarely survive this process....

This is the most frghtening moment of any sculpture - the clay original is lost and you don't yet know if the mould has worked, so as quickly as I can I replaced the mould back together and secured with tape (it was a touch too big for a rubber band), poured in the resin and crossed my fingers!

Success!... Well almost - whilst wrestling this little cast out I manager to snap off both back legs - I'd left the resin too long to set and it had cooled down, it remains flexible for short while after curing but I had allowed this one to cool and lose the flexibility. This isn't a disaster, I could have pinned them and carried on, but instead I thought I'd cast another copy, this grey was a little too light for my liking (you see why shortly). This is a good example of why "butterfly" moulds like this aren't usually used as production moulds; they put a great strain on the model being cast and could result in a large number of casualties.

Success! Actual full success this time, a lovely bubble free casting in the perfect shade of grey, still warm and flexible enough to survive de-moulding. This is the point where I can breather again and relax knowing that my work is safe, it's a wonderful moment in the process! You can see here that I've trimmed off all the sprues except for the ones on the hooves. This was my plan for those larger sprues - they would now serve as pins to allow the model to be inserted into the base!

I got to work on the resin model, using sandpaper, rifflers, files and my trusty Rio Rondo Carbide Scraper set, then using Apoxie Sculpt in Silver Grey to resculpt with. The reson I use the grey is that sculpting wit white materials is both messy and difficult to see what you're doing, it's also very hard to photograph. I find using a grey resin along with the grey Apoxie helps to hide the patches where I've worked and allow me to "see" the model without distraction.

Now was the time I could start on the base. The holes where the legs would slot in were set by placing brass tubes over the pins, they fitted very snuggle so I know the foal would later fix securely into the base. Once in position, I set them with glue and added some Apoxie around them to make sure they didn't shift. I placed the foal in position and left the Apoxie to cure fully before I proceeded. I continued to work on the resin foal and base.

I've skipped a few sessions here, but this is the base finished, I was aiming for a grassy meadow waving in the breeze. It also featured some tiny daisies (of course...!) and my signature mouse.


...and she was finished! Here are some photos of the original sculpture before she was shipped off to Barry Moore in the US for casting.


...and here she is! In beautiful pure white resin, with wire supports not only in her bag legs but also the front legs and tail -these little ladies are strong and solid, Barry ensured that the bases were perfectly level and that the foals sit snugly in them.


My first plan of action once I'd received the first box was to send a copy to my friend and master pony bag maker, Beccy Fielding. She sourced some perfect fabric featuring daisies on a bright blue background with added sparkly. The sparkly bits are flush with the fabric so are safe for painted models to be paid on them at shows, I was tickled pink with the fabric and when the bags arrived, I was absolutely chuffed to bits with how beautifully made they are!


So, that is Dancing Daisy's story. Here are some shots of a few painted copies of her. She is quite versatile and could represent a number of breeds


1 comment:
Oh she looks fabulous Kelly! It's always fascinating to read about your process :)
Post a Comment