- Continued from my previous post; this is the "shrinky" cast of Frodo, next to a full sized copy. As you can see it's about half the size, which not only adds to the "aah" factor, but also means I can afford to use the more expensive (and exciting) materials when I come to make copies.
- I actually made this copy back in July, but it's been on hold for a while, just in case you remember it from my July postings.
- This is NOT the final prototype for the little run of models I wanted to make; I wanted to remove the border, shave down the background part at the top to re-centre the sculpture, and there were a miliion teeny tiny pinholes (50% of the size they were when it cast, so even more fiddly!) that needed sorting out.
- As this copy was made from the special resin, it was rubbery and flexible, which is no good for making these changes on. So I made a mold of this, and took a normal resin copy to work on.
- After doing as much as I felt necessary, I took a mold from my new prototype and the made the first finished copy....
- ...so I thought! The photo below shows this first copy, it's a brass head on a slate background, and has been treated on the mane, eye and nostrils with chemicals to darken them. As you can see this copy if far from perfect - there are an uncomfortable number of pinholes still there, and the background isn't as smooth as I'd hoped.
- I still felt this model was pretty cute, and was very pleased with the effect hat the chemicals had on the brass - I've had mixed results using chemicals like this so this model was a good learning experience, and made a pretty little gift to a little girl I know who likes ponies!
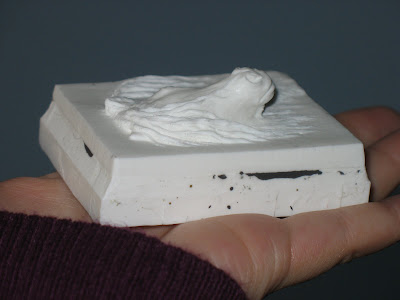
- So finally, after taking ANOTHER cast from the new mold; filling in many many pinholes and making a couple of adjustments, I had a second Prototype, which I'm happy to say was much more successful, it is the white model pictured below.
- I had to be a bit more clever than usual when I made this prototype - now that I have my great new vaccum casting machine I have to bear in mind that during the vacuum process the poured resin expands as the air inside it is expelled. This has lead to a few messy encounters and I was keen to avoid these with this little guy!
- As you can see, although the background to the model is actually only about 5mm thick if that, I built up the base using clay and Lego (Lego is a handy thing to have around during mold-making, I've discovered!) to give a deeper mold and allow any expansion of resin without spillage.
- This copy looks quite dirty as there was some slate residue left in the mold from the first cast; not very good practice on my part to be honest, oops!
- So, with the new prototype I was ready to make a (third and final) mold, ready to make lots of funky little colourful copies!
Wanna see the results? Here they are!


No comments:
Post a Comment